Tuesday, September 29, 2009

W5100 simple UDP protocol development and code analysis (Transalated Version)

Here is my W5100 simple UDP protocol code analysis,using W5100 development board (atmega128)

We can see, UDP and TCP protocols, respectively, in fact, very easy to use, as long as you can call the different functions.

Note the code is as follows:


#include
#include
#include
#include
#include
#include "../header/types.h"
#include "../header/serial.h"
#include "../header/socket.h"
#include "../header/w5100.h"
#define MAX_SIZE 2048
#define RX_BUF 0x1100
#define TX_BUF 0x1900
void main()
{
cli(); // disable interrupt
EICRA=0x00;
EICRB=0x00;
EIMSK=0x00;
EIFR=0x00;
MCUCR = 0x80; // enable external ram
XMCRA=0x40; //define lower sector of memory for EXternal ram and upper sector for W5100C and others
sei(); // enable interrupts
uart_init(0,7);
lcd_init();
uint8 destip[4];
uint8 addr[6];
iinchip_init();
sysinit(0x55,0x55); //
addr[0] = 192; addr[1] = 168; addr[2] = 1; addr[3] = 20;
setSIPR(addr);
addr[0] = 192; addr[1] = 168; addr[2] = 1; addr[3] = 1;
setGAR(addr);
addr[0] = 255; addr[1] = 255; addr[2] = 255; addr[3] = 0;
setSUBR(addr);
memcpy(addr, "\x00\x08\xDC\x00\x00\x00",6);
setSHAR(addr);
uint8 lcd[50];
sprintf(lcd,"IP: %d.%d.%d.%d",IINCHIP_READ(SIPR0),IINCHIP_READ(SIPR0+1),IINCHIP_READ(SIPR0+2),IINCHIP_READ(SIPR0+3));
lcd_puts(lcd); //print LCD string into LCD

uint8 len;
// set UDP mode
socket(0, Sn_MR_UDP, 5000, 0);
// listen(0); //UDP no need to listen
if( getSn_SR(0) == SOCK_UDP)
{
printf("UDP Mode"); // Check socket status register, it is in UDP status
}
while(getSn_RX_RSR(0) ==0 ); // if got data, RX buffer over 0, while loop will end
printf("got data \r\n");
len = getSn_RX_RSR(0); // get length of data received
uint8 * TX_BUFFER = (uint8 *) TX_BUF;
uint8 * RX_BUFFER = (uint8 *) RX_BUF; // make transmit and receive buffer
if( len > MAX_SIZE)
len = MAX_SIZE; // limit the length of data to be copy into TX/RX buffer as MAX
//extern uint16 send(SOCKET s, const uint8 * buf, uint16 len); // Send data (TCP)
//extern uint16 recv(SOCKET s, uint8 * buf, uint16 len); // Receive data (TCP)
//extern uint16 sendto(SOCKET s, const uint8 * buf, uint16 len, uint8 * addr, uint16 port); // Send data (UDP/IP RAW)
//extern uint16 recvfrom(SOCKET s, uint8 * buf, uint16 len, uint8 * addr, uint16 *port); // Receive data (UDP/IP RAW)
//sendto and recvfrom are used for UDP, in contrast, TCP uses send and recv function
// because TCP is connection oriented, once connection is established, no need to assign send to which or receive from which client
len = recvfrom(0,RX_BUFFER,len, destip, 5000); //receive into RX buffer
printf("the size is %u \r\n",len);


printf("%s",RX_BUFFER);
// printf("%02x",*(RX_BUFFER + 1));
// printf("%02x",*(RX_BUFFER +2) );
// in case of more than one character, print 0, 1, 2 address
sendto(0,RX_BUFFER,len,destip, 5000); //send RX buffer to client
}


Translated from Johnny Yan,posted on 28/09/2009
The direct link (Chinese Version): http://blog.sina.com.cn/s/blog_61b952280100f8qj.html

Thursday, September 24, 2009

Internet Radio (iRadio) Application Profile

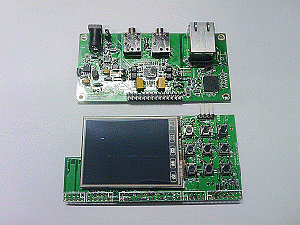
Internet Radio (iRadio) is an R n D case from our partners, he used a low-end MCU to handle audio decoding, using W5100 to deal with network and network audio streaming data acceptance. The main chip is a ATMEL AVR32, the server uses the open DLNA server program. At last, the network audio are streaming playback.

The schematic and main configurations are as follows.

Main hardware configurations:
Hardware Specifications:

- AVR32 for MP3 and WMA decoding
- W5100 10/100Mbps Ethernet Controller with Network Protocols
- 1MByte SDRAM for audio buffering
- 2.4” color TFT (320x240)
- DC 5V input for core, DC12 input for Audio Amplifier
BOM List:
- W5100 + RJ45
- AVR32 or similar
- SDRAM 1MByte
- 2.4” TFT (2.2”)
- Power and Misc
- Audio Amplifier (about 20W)
Features:
- Local playback on SD Card (pending, waiting for Atmel)
- Internet Radio with MP3 (working now) and WMA format (debugging)
- Download Station lists from Portal in XML format
- DLNA Renderer to play audio streamed from DLNA server
Server format:

• HTTP: working now
• MMS: implementing
• RTSP: planned
Applications:
- Internet Radio, with DLNA Renderer
- Embedded with other AV system, (no need to count TFT), such as Boom box, Photo frame,
DVB, DVD…even we could share the SoC in the system, for example, in DVD; we just need to add W5100 + RJ45 to have same functions.

Translated from Johnny Yan on 20/09/2009
Direct link (Chinese version): http://blog.sina.com.cn/s/blog_61b952280100f4ox.html


W5100 simple TCP communication protocol development and firmware update

Here is my W5100's TCP protocol with a simple firmware notes, we use the W5100 development board (W5100E01-ARV), the development and updating is very simple, AVR Studio using schematic at the end.

This socket program to achieve a simple build, Ethernet sends and receives data procedure.
You can call the device terminal to test. (In WIZnet the home page you can search for this small software, can easily exchange data in serial and Ethernet)

Procedures are as follows:


#include # include
#include # include
#include # include
#include # include
#include # include
#include "../header/types.h" # include ".. / header / types.h"
#include "../header/serial.h" # include ".. / header / serial.h"
#include "../header/socket.h" # include ".. / header / socket.h"
#include "../header/w5100.h" # include "../header/w5100.h"
#define MAX_SIZE 2048 # define MAX_SIZE 2048
#define RX_BUF 0x1100 # define RX_BUF 0x1100
#define TX_BUF 0x1900 # define TX_BUF 0x1900
void main() void main ()
{ (
//initialize / / initialize
cli(); // disable interrupt cli (); / / disable interrupt
EICRA=0x00; EICRA = 0x00;
EICRB=0x00; EICRB = 0x00;
EIMSK=0x00; EIMSK = 0x00;
EIFR=0x00; EIFR = 0x00;
MCUCR = 0x80; MCUCR = 0x80; // enable external ram / / Enable external ram
XMCRA=0x40; //define lower sector of memory for EXternal ram and upper sector for W5100C and others XMCRA = 0x40; / / define lower sector of memory for EXternal ram and upper sector for W5100C and others
sei(); sei (); // enable interrupts / / Enable interrupts
uart_init(0,7); uart_init (0,7);
lcd_init(); lcd_init ();
//set IP address / / set IP address
uint8 addr[6]; uint8 addr [6];
iinchip_init(); iinchip_init ();
sysinit(0x55,0x55); // sysinit (0x55, 0x55); / /
addr[0] = 192; addr[1] = 168; addr[2] = 1; addr[3] = 20; addr [0] = 192; addr [1] = 168; addr [2] = 1; addr [3] = 20;
setSIPR(addr); setSIPR (addr);
addr[0] = 192; addr[1] = 168; addr[2] = 1; addr[3] = 1; addr [0] = 192; addr [1] = 168; addr [2] = 1; addr [3] = 1;
setGAR(addr); setGAR (addr);
addr[0] = 255; addr[1] = 255; addr[2] = 255; addr[3] = 0; addr [0] = 255; addr [1] = 255; addr [2] = 255; addr [3] = 0;
setSUBR(addr); setSUBR (addr);
memcpy(addr, "\x00\x08\xDC\x00\x00\x00",6); memcpy (addr, "\ x00 \ x08 \ xDC \ x00 \ x00 \ x00", 6);
setSHAR(addr); setSHAR (addr);
uint8 lcd[50]; uint8 lcd [50];
// IINCHIP_READ / / IINCHIP_READ get register value from SIPR(Source IP register) get register value from SIPR (Source IP register)
sprintf(lcd,"IP: %d.%d.%d.%d",IINCHIP_READ(SIPR0),IINCHIP_READ(SIPR0+1),IINCHIP_READ(SIPR0+2),IINCHIP_READ(SIPR0+3)); sprintf (lcd, "IP:% d.% d.% d.% d", IINCHIP_READ (SIPR0), IINCHIP_READ (SIPR0 +1), IINCHIP_READ (SIPR0 +2), IINCHIP_READ (SIPR0 +3));
lcd_puts(lcd); lcd_puts (lcd); //print LCD string into LCD / / print LCD string into LCD
uint8 len; uint8 len;
//Create socket 0 for TCP mode / / Create socket 0 for TCP mode at port 5000 at port 5000
//#define Sn_MR_TCP / / # define Sn_MR_TCP 0x01 0x01
socket(0, Sn_MR_TCP, 5000, 0); socket (0, Sn_MR_TCP, 5000, 0);
//extern uint8 socket(SOCKET s, uint8 protocol, uint16 port, uint8 flag); / / extern uint8 socket (SOCKET s, uint8 protocol, uint16 port, uint8 flag);
//listen the socket 0 / / listen the socket 0
listen(0); listen (0);
//check the status of Listen status (if entered), print to serial / / check the status of Listen status (if entered), print to serial
if( getSn_SR(0) == SOCK_LISTEN) if (getSn_SR (0) == SOCK_LISTEN)
{ (
printf("Listen Mode"); printf ( "Listen Mode");
} )
// if data is received / / If data is received
// extern uint16 getSn_RX_RSR(SOCKET s); // get socket RX recv buf size / / Extern uint16 getSn_RX_RSR (SOCKET s); / / get socket RX recv buf size
while(getSn_RX_RSR(0) ==0 ); while (getSn_RX_RSR (0) == 0);
printf("got data \r\n"); printf ( "got data \ r \ n");
//print data length / / print data length
len = getSn_RX_RSR(0); len = getSn_RX_RSR (0);
printf("the size is %u \r\n",len); printf ( "the size is% u \ r \ n", len);
//set Send(TX) and Receive(RX) buffer pointer / / set Send (TX) and Receive (RX) buffer pointer
uint8 * TX_BUFFER = (uint8 *) TX_BUF; uint8 * TX_BUFFER = (uint8 *) TX_BUF;
uint8 * RX_BUFFER = uint8 * RX_BUFFER = (uint8 *) RX_BUF; (uint8 *) RX_BUF;
if( len > MAX_SIZE) if (len> MAX_SIZE)
len = MAX_SIZE; len = MAX_SIZE;
//put the received data into RX buffer, save length to len / / put the received data into RX buffer, save length to len
len = recv(0,RX_BUFFER,len); len = recv (0, RX_BUFFER, len);
//send data from RX Buffer to socket 0 / / send data from RX Buffer to socket 0
send(0,RX_BUFFER,len); send (0, RX_BUFFER, len);
} )

Compiled using AVR STUDIO, generate hex file, and then burn to the MCU chip (Atmega128)
Images are as follows:

http://photo.blog.sina.com.cn/blogpic/61b952280100f4ou/61b95228g740500163fad

In the next blog, we will try to introduce how to use the UDP protocol.
I hope you can enjoy it!

Johnny


The blog was translated from Johnny Yan on 20/09/2009

Direct link(In Chinese Version): http://blog.sina.com.cn/s/blog_61b952280100f4ou.html

Wednesday, September 23, 2009

Full hardware Ethernet + W7100 single-chip microcontroller program

W7100 in a chip set and the 8051 standard full hardware decoding of microcontroller and TCP / IP Ethernet protocol stack.It is WIZnet traditional full-extension hardware, networking chip functionality to give users a single-chip Ethernet + master-chip choices.

See the following diagram:
http://photo.blog.sina.com.cn/blogpic/61b952280100f1si/61b95228gc82b5a862d05

Its basic features include:
· Single-chip embedded network program
· Built 8051
· Full hardware TCP / IP network protocol stack
· 10/100 Ethernet
· 64K Byte e-Flash Memory
· 64K Bytes SRAM memory


It is an extension of traditional products W5100 features and upgrades. For some users, if the processing capacity of 8051 has been adequate to meet the application requirements, then the W7100 can easily add Ethernet capabilities for these applications at the same time to replace the main chip. Both of them get the advantages in terms of price and performance.


More information can visit the product home page at:http://www.wiznet.co.kr/en/pro02.php?&ss [2] = 1 & page = 1 & num = 211


Translated from Johnny Yan on 13/09/2009
The Link: http://blog.sina.com.cn/s/blog_61b952280100f1si.html

W7100 Study Notes-W7100 parts of the firmware (firmware) parsing

With the launch of our new W7100 chipset, the firmware development is constantly updated and improved to meet the needs of different customers

The Hong Kong Branch of WIZnet Ltd. is now designing customized firmware to accommodate different applications.

Typically, users can easily use our hardware tcp/ip stack without in-depth knowledge of TCP/IP.
As the network protocol is fully processed by hardware, the user simply uses the driver which we provide, and calls different functions to complete various network tasks.
For example, if the user would like to connect by using TCP, the connect function should be called.

The user simply uses socket programming to control our chipset while leaving out the complicated details for our hardware TCP/IP core to process.
Here is my W7100 firmware for the connect function. As you can see, the internal operation of the function is not very difficult. The user can easily change the function to accommodate his/her needs.
int8 connect(SOCKET s, uint8 * addr, uint16 port)
{
uint8 xdata ret;

if
(
((addr[0] == 0xFF) && (addr[1] == 0xFF) && (addr[2] == 0xFF) && (addr[3] == 0xFF))
((addr[0] == 0x00) && (addr[1] == 0x00) && (addr[2] == 0x00) && (addr[3] == 0x00))
(port == 0x00)
)
Check if the IP address and Port number is coorect (IP cannot be 255.255.255.255, or 0.0.0.0, port cannot be 0
{
ret = 0;
}
else
{
If IP and Port both no problem, continue
ret = 1;
// set destination IP
IINCHIP_WRITE(Sn_DIPR0(s),addr[0]); set Dest IP first byte
IINCHIP_WRITE((Sn_DIPR0(s) + 1),addr[1]);
IINCHIP_WRITE((Sn_DIPR0(s) + 2),addr[2]);
IINCHIP_WRITE((Sn_DIPR0(s) + 3),addr[3]);
IINCHIP_WRITE(Sn_DPORT0(s),(uint8)((port & 0xff00) >> 8)); dest Port lower byte
IINCHIP_WRITE((Sn_DPORT0(s) + 1),(uint8)(port & 0x00ff)); dest Port higher byte
IINCHIP_WRITE(Sn_CR(s),Sn_CR_CONNECT); exe the command of tcp connect
while ( IINCHIP_READ(Sn_CR(s)) ) ; // wait for completion CR
}

return ret;
}

Johnny

Translated from Johnny Yan 0n 13/09/2009
Direct link: http://blog.sina.com.cn/s/blog_61b952280100f1sl.html

FAE Basic Training

This week, we will have our first Basic FAE training.

Time: September 24, 2009 (2:30pm Hong Kong Time (GMT+8))
Method: Webex
Language: English

Please download the training material from the link below:

Please rate my training by registering to our forum. We welcome you post anything related to our products and questions as well.

Here is the link to register

After registering, you can vote and post comments in my thread
http://www.wizwiki.net/forum/viewtopic.php?f=13&t=62

Welcome to our WIZwiki forum. I look forward to seeing you all in our forum.

Thank you very much!

Tuesday, September 22, 2009

W5100 simple and compact network news display

Network News display


The following video is one of the designs from our past contest.We have held a design contest in 2007. Here is the second prize winner.


For more details please refer to the U.S. magazines: and our Wiz WiKi. website


I would like to briefly explain the functionality of this device:
Basically, the W5100 receives the news from a News website. Once the W5100 remove all the TCP/IP headers, the news data is parsed out from the packet and stored in the MCU’s memory. Finally, the News is displayed onto the LED display.
The schematic and video are shown below:


A video could be viewed through the link
http://blog.sina.com.cn/s/blog_61b952280100eyxd.html


The blog was translated from Mr. Johnny Yan on 07/09/2009


Wifi Alternative

So recently, I have been talking to some customers about products with WIFI.

Here are a list of problems which they have encountered

1) The cost is high
2) Setup is complicated for End Customer
3) Power consumption is high

So what do we do if we dont use wifi? Is there any other altenatives? Of course there is! The answer is RF transceiver! They are relatively cheap when compared with WIFI solutions. Since there are no specific protocol to follow in the RF solution , it is very easy to setup. Most of all, the power consumption is low! So you can use it for mobile devices. :)

With these advantages, the RF solution is a good replacement for WiFi, but what if you want to use RF with Internet capabilities? Then you should consider using a Ethernet to RF gateway. This is a good solution since you don’t have to spend a lot of money on the hardware and also the user can sync the receiver and transmitter by just clicking a button.

Below shows the Ethernet to RF gateway. This is for connecting to the router.


The module below is the receiver which is the mobile device


Basically, the RF transceivers act as a wireless link for the internet connection.


This concludes our article for today. Thank you!

SPI Guide Part 2

In this session, we will talk about the SPI write and read process. Currently, our chipset W3150A+ and W5100 supports SPI mode 0. It's important to know which mode your SPI uses. Or else it wont work at all. Please make sure that your MCU supports SPI mode 0.

Anyway it is very basic to use the SPI interface. Basically you just have to follow the format below:


For the write operation, you should write the OP-code 0xF0 (11110000) follow by the 2 bytes address and finally the 1 byte of data which you wanted to write.


For the read operation, you should write the OP-code 0x0F (00001111) follow by the 2 bytes address. Then, our chip will send you the 1 byte of data by the MISO line.

The SPI follows the timing diagram below:


Notice in the timing diagrm:
When sending the OP-CODE, the MISO line is 0x00.
When sending the address, the MISO line is 0x01 follow by 0x02
When the data is written, the MISO line is 0x03.
When the data is read, the MISO line is the requested data.

I hope you enjoy my article Thanks!

Sunday, September 13, 2009

W5100 PCB design Considerations


The other day I was visiting my customer in China. I actually visited a few customers. Actually, you do get a lot more information from the customer when you talk to them face to face instead of email. I guess some customers won't tell you their problem until you meet them in person.
Anyway, this customer I visited has designed their own board and PCB. Upon looking at their PCB, I noticed that the MAG JACK's ground is not isolated. This might cause EMI and EMC interference. It is a better pratice to seperate the ground planes especially the RJ45 is very likely to sustain noise from the Ethernet cable. In this article, we will go through a few design considerations for the PCB design.

1) Isolate the ground plane of RJ45 from the main ground plane. Connect these two ground plane by ferrite bead. Be sure there is no ground plane under the isolated area

2) Place circuitry A and B as highlighted in the picture as close to the magnetic as close as possible

3) The crystal should not be placed close to I/O port, edge of PCB board or the magnetic devices


I hope this helps you design your PCB board :) Thanks!


Serial to Ethernet Part 3

In part three of serial to Ethernet, we will go over the data receiving process from the Ethernet. Because we are not using any interrupt for Ethernet data, we are basically checking if there are any Ethernet data stored in the RX buffer. If there are data in the RX buffer, we will print out the data from the Ethernet. The first step is to check for the number of data inside the RX buffer by using the getSn_RX_RSR function. This function returns the number of bytes in the RX buffer. If this value is greater than 0, this means that you can use the recv function to get the data.

void lan_to_rs232()
{
uint16 xdata chk_length; // length checker
uint16 xdata rcv_length; // length of data received
uint16 xdata idx; // for loop index

chk_length = getSn_RX_RSR(0); // get length of data in lan receive buffer
if(chk_length > 0) // check if there is data in lan receive buffer
{
if(chk_length > MAX_BUF_SIZE) chk_length = MAX_BUF_SIZE;

//check if length of lan received buffer is more than LAN_RX_BUF

rcv_length = recv(0,LAN_RX_BUF,chk_length); //receive data

for(idx = 0; idx <>

Sunday, September 6, 2009

SPI Guide

SPI is one of the popular interfaces for embedded systems. Since SPI supports full duplex mode as oppose to I2C , it is a very attractive interface. Also, this interface uses four wires only (MOSI, MISO, Chip select and a reference clock) Because SPI doesn't need any special protocol to use it, it's actually a very simple interface and easy to use.

Currently, only our W3150A+ and W5100 support the SPI interface. Our chipsets run in SPI slave mode 0.

In order to use our chip via SPI, you should connect our chip by using the following schematic.

Be sure that the SEN pin is connected to the source. If you are using multiple SPI peripherals, you should use an inverter to invert the /SCS signal. Then, the inverted signal should be feed to the SEN pin to avoid any problems with other SPI devices. The following schematic is for multiple SPI peripherals.

This is the basic connection for the SPI interface. I hope you enjoy! Thank you


Friday, September 4, 2009

Serial to Ethernet Gateway Part 2

In this article, we will continue where we left off last week. After talking about the concept of ring buffer, how do we get the Serial data ? I have used serial interrupt to get data from the serial buffer. So whenever I get Serial data, the interrupt flag will be triggered. At this time, I have made the program to run an interrupt subroutine which gets data from the Serial Buffer and copy these data to anther designated buffer.

One question is what happens if the serial data buffer is full? In my design, whenever the serial buffer is full, we would send out all the data in the current serial buffer all at once. This ensures that none of the incoming serial data gets dropped due to the buffer is full.

Below is the code I have made. The first function is the interrupt subroutine, and the second function is to prepare the serial buffer for the LAN transfer buffer to send.


void ISR() interrupt 4 //ISR for UART
{
ES = 0; //Disable UART interrupt

if(RI) //Check for Receive Interrupt flag
{
RS232_RX_BUF[rs232_rx_write_idx] = SBUF; //write data from Serial buffer to uart rx buffer
rs232_rx_write_idx++; // increment write pointer
if(rs232_rx_write_idx >= MAX_RS232_BUF_SIZE) // check if write pointer is bigger than Maximum size of RS232_RX_BUF
{
rs232_rx_write_idx = 0; // reset write pointer to zero
}

if (rs232_rx_write_idx == rs232_rx_read_idx ) isfull = 1; // buffer is full, ignore new serial data
else
{
if (rs232_rx_write_idx == rs232_rx_read_idx ) isfull = 1; //buffer is full
}
RI = 0; // Disable Receive Interrupt flag
}
ES =1; //Enable UART Interrupt
}

uint16 rs232_to_lan()
{
uint16 xdata safe_read; // local read pointer
uint16 xdata safe_write; // local write pointer
uint16 xdata length; // length of data to be read
uint16 xdata count; // for loop counter

EA = 0; //disable all interrupt
safe_read = rs232_rx_read_idx; // get current value of read pointer
safe_write = rs232_rx_write_idx; // get current value of write pointer
EA = 1; //enable all interrupt

if(safe_write > safe_read)
{
length = safe_write - safe_read; // calculte the number of data to be read
}

else if(isfull == 1)
{
length = MAX_RS232_BUF_SIZE;
}
else
{
length = (MAX_RS232_BUF_SIZE - safe_read) + safe_write; // calculate the number of data to be read
}

for(count = 0; count <>
{
LAN_TX_BUF[lan_tx_write_idx] = RS232_RX_BUF[safe_read]; //write data from RS232 RX buffer to LAN TX buffer
safe_read++; //increase read pointer
if (safe_read >= MAX_RS232_BUF_SIZE) safe_read = 0; //RS232 RX buffer boundary check
lan_tx_write_idx++; //incread write pointer
if (lan_tx_write_idx >= MAX_BUF_SIZE) lan_tx_write_idx = 0; //LAN TX buffer boudary check
}

EA = 0; //disable all interrupt
rs232_rx_read_idx = safe_read; //return local readpointer to rs232 read pointer
EA = 1; //enable all interrupt
return length; //return length of data read
}

Thank you. I hope you enjoy my article. :)